

Hey in this post, we will continue with the application which we created in our previous post. In this post, we will cover saving the expense record to the database. let’s begin…
We will cover the following topics in this post,
- Create rest endpoint to save expense object
- Make HTTP POST request from an angular application to save the record
First, let’s create a rest endpoint to save the expense object – inside the ExpenserService.java, declare a new method to save the expense object.
Table of Contents
Open, ExpenseService.java
package in.bushansirgur.expensetracker.service;

import java.util.List;

import in.bushansirgur.expensetracker.model.Expense;

public interface ExpenseService {

	List<Expense> findAll();

	Expense save(Expense expense);

}
Next, we need to provide implementation, to save method by overriding inside the ExpenseServiceImpl.java class
Open, ExpenseServiceImpl.java
package in.bushansirgur.expensetracker.service;

import java.util.List;

import org.springframework.beans.factory.annotation.Autowired;
import org.springframework.stereotype.Service;

import in.bushansirgur.expensetracker.model.Expense;
import in.bushansirgur.expensetracker.repository.ExpenseRepository;

@Service
public class ExpenseSerivceImpl implements ExpenseService {

	@Autowired
	ExpenseRepository expenseRepository;

	@Override
	public List<Expense> findAll() {
		return expenseRepository.findAll();
	}

	@Override
	public Expense save(Expense expense) {
		expenseRepository.save(expense);
		return expense;
	}
}
Now, we have created a service method to save expense objects, next all we need to do is, call this service method from the ExpenseController.java. let’s do that…
Open, ExpenseController.java
package in.bushansirgur.expensetracker.controller;

import java.util.List;

import org.springframework.beans.factory.annotation.Autowired;
import org.springframework.http.HttpStatus;
import org.springframework.http.ResponseEntity;
import org.springframework.web.bind.annotation.CrossOrigin;
import org.springframework.web.bind.annotation.DeleteMapping;
import org.springframework.web.bind.annotation.GetMapping;
import org.springframework.web.bind.annotation.PathVariable;
import org.springframework.web.bind.annotation.PostMapping;
import org.springframework.web.bind.annotation.RequestBody;
import org.springframework.web.bind.annotation.RequestMapping;
import org.springframework.web.bind.annotation.RestController;

import in.bushansirgur.expensetracker.model.Expense;
import in.bushansirgur.expensetracker.service.ExpenseService;

@CrossOrigin("*")
@RestController
@RequestMapping("/api/v1")
public class ExpenseController {

	@Autowired
	ExpenseService expenseService;

	@GetMapping("/expenses")
	public ResponseEntity<List<Expense>> get() {
		List<Expense> expenses = expenseService.findAll();
		return new ResponseEntity<List<Expense>>(expenses, HttpStatus.OK);
	}

	@PostMapping("/expenses")
	public ResponseEntity<Expense> save(@RequestBody Expense expense) {
		Expense expenseOne = expenseService.save(expense);
		return new ResponseEntity<Expense>(expenseOne, HttpStatus.OK);
	}

}
Alright, now we have a rest endpoint to save the expense. let’s test this endpoint through postman.
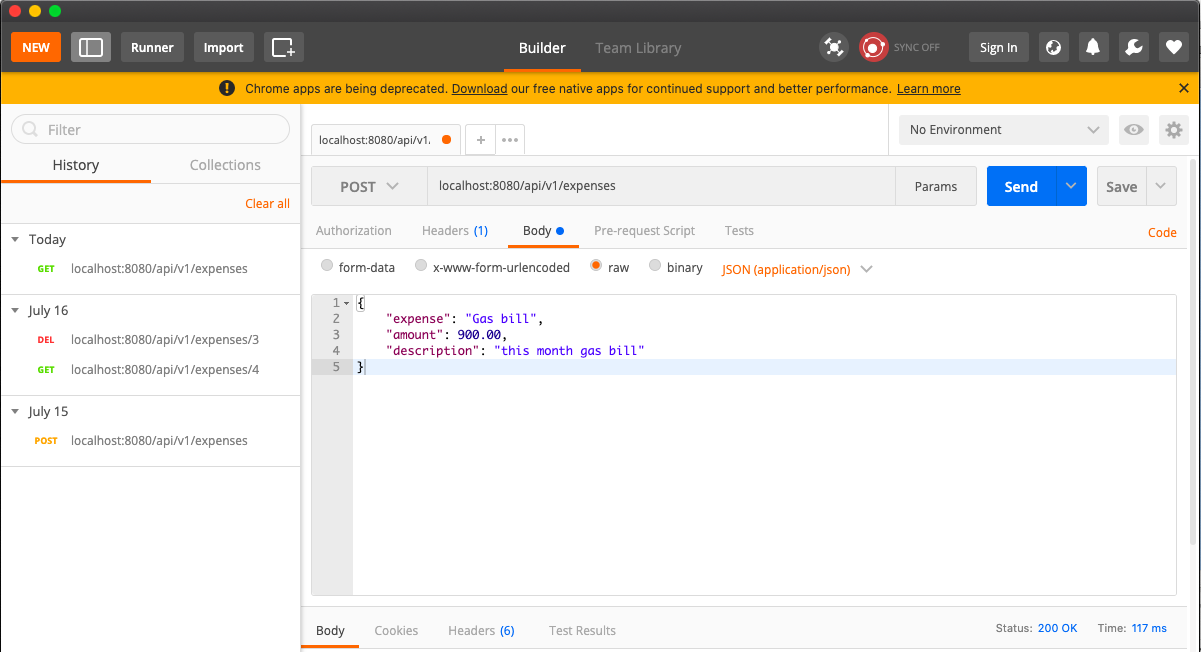
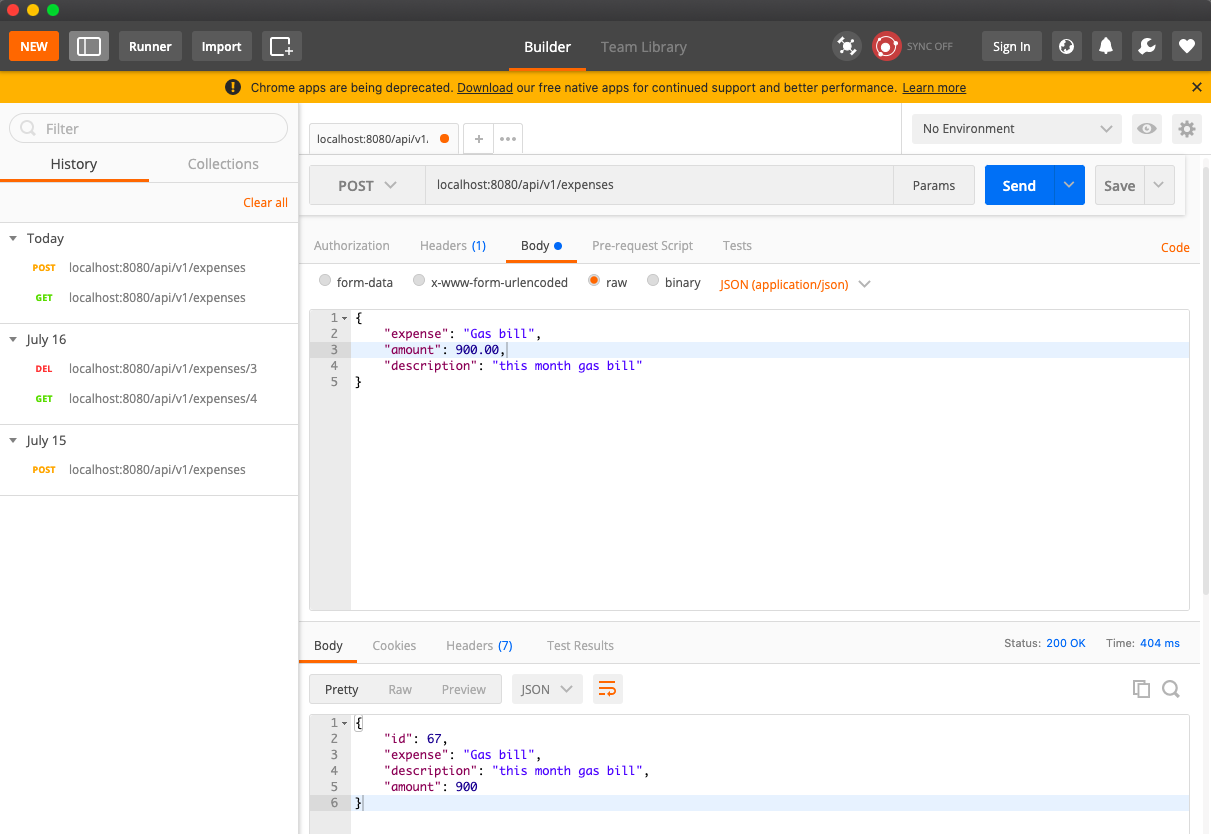
Alright, out rest endpoint is working as we expected. Now let’s move on to the front end part where we will make an HTTP POST request to this rest endpoint. let’s begin…
Open, expense.service.ts
import { Injectable } from '@angular/core';
import { HttpClient } from '@angular/common/http';
import { Observable } from 'rxjs';
import { map } from 'rxjs/operators';
import { Expense } from '../models/expense';

@Injectable({
  providedIn: 'root'
})
export class ExpenseService {

  private getUrl: string = "http://localhost:8080/api/v1/expenses";

  constructor(private _httpClient: HttpClient) { }

  getExpenses(): Observable<Expense[]> {
    return this._httpClient.get<Expense[]>(this.getUrl).pipe(
      map(response => response)
    )
  }

  saveExpense(expense: Expense): Observable<Expense> {
    return this._httpClient.post<Expense>(this.getUrl, expense);
  }

}
So, now we have created a service method to save expense details by making an HTTP POST request to the rest endpoint. Now let’s call this method inside the add.expense.component.ts file
Open, add.expense.component.ts
import { Component, OnInit } from '@angular/core';
import { Expense } from 'src/app/models/expense';
import { ExpenseService } from 'src/app/services/expense.service';
import { Router, ActivatedRoute } from '@angular/router';

@Component({
  selector: 'app-add-expense',
  templateUrl: './add-expense.component.html',
  styleUrls: ['./add-expense.component.css']
})
export class AddExpenseComponent implements OnInit {

  expense: Expense = new Expense();

  constructor(private _expenseService: ExpenseService,
              private _router: Router) { }

  ngOnInit(): void {

  }

  saveExpense() {
    this._expenseService.saveExpense(this.expense).subscribe(
      data => {
        console.log('response', data);
        this._router.navigateByUrl("/expenses");
      }
    )
  }
}
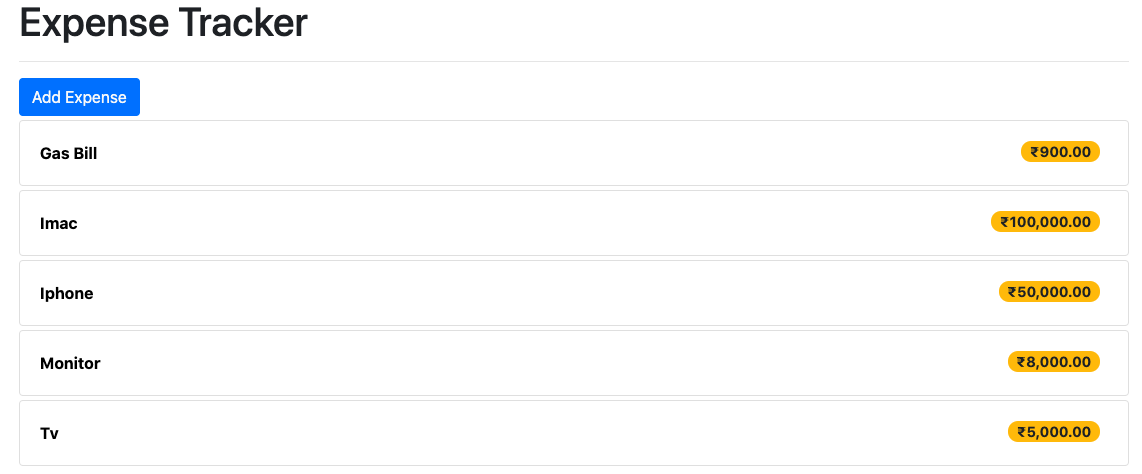
Alright, now we need to create button inside the list-expense.component.html to navigate to add-expense.component.html
Open, list-expense.component.html
<div class="col-md-4">
    <a class="btn btn-primary text-light" routerLink="/addexpense">Add Expense</a>
</div>
<div>
    <div class="card mt-1" *ngFor="let expense of expenses">
        <a href="#" class="card-body flex">
            <span class="text-capitalize font-weight-bold">{{expense.expense}}</span>
            <span class="float-right mr-2 badge badge-pill badge-warning font-weight-bold amount">{{expense.amount | currency: 'INR'}}</span>
        </a>
    </div>
</div>
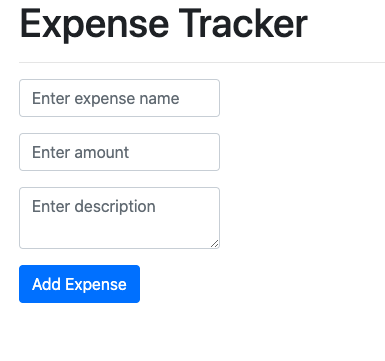
Now, all we need to do is create a form inside add-expense.component.html to enter the expense details
Open, add-expense.component.html
<div class="container">
        <div class="row">
                <form (ngSubmit)="saveExpense()">

                        <div class="form-group">
                                <input type="text" name="expense" [(ngModel)]="expense.expense"
                                placeholder="Enter expense name" class="form-control col-md-12 "/>
                        </div>

                        <div class="form-group">
                                <input type="text" name="amount" [(ngModel)]="expense.amount" placeholder="Enter amount"
                                class="form-control col-md-12" />
                        </div>

                        <div class="form-group">
                                <textarea type="text" name="description" [(ngModel)]="expense.description"
                                placeholder="Enter description" class="form-control col-md-12"></textarea>
                        </div>

                        <button type="submit" class="btn btn-primary">Add Expense</button>

                </form>
        </div>
</div>
So with this in place, if you run the application, you will get the following output –
You can find the Github repository here
You can find the step by step video series here
Sir i’m interested in this blog but the article very hard to follow, you don’t explain some things clear
Hello, can you please tell me what you don’t understand in this?
Sir, in last video of your Spring boot masterclass you were creating the delete function….but what after that, which videos are there for the complete development process…..it is to jumbled