

In this post, we will learn about map a collection of basic type using Hibernate @ElementCollection and @CollectionTable annotation.
Learn about developing CRUD application using Spring MVC and Hibernate
Imagine the scenario
We are creating a Employee Tracking Application, each employee can have multiple phone numbers and multiple address. In order to persist the employee data we need to create database table for storing phone numbers and addresses.
 Look at the above database design, we have 3 tables, employee, phone number and address. Both the
 employee_phone_number and employee_address table contains employee_id which is foreign key to the employee table.
We can easily achieve this by implementing an object level mapping which One-to-Many relationship which is provided by JPA/Hibernate. But if you observe carefully, phone number is a String type and address is Embeddable type. So if you have a basic type like String, Integer, Double or an embeddable type like address then Hibernate has provided a solution in the form of @ElementCollection and @CollectionTable annotation.
Important Annotations
| Annotation | Description |
| @ElementCollection | It marks as map to a collection. All the records of the collection are stored in a seperate table. |
| @CollectionTable | Specify the name of the table in which all the collection information is stored. |
| @JoinColumn | It refers to the primary table column. |
Understand with Example
Now let’s understand @ElementCollection and @CollectionTable annotation with an example
Tools and Technologies Used
- Hiberante – 5.4.4.Final
- MySQL – 5.1.47
- JDK – 1.8 or later
- Maven – 3.1
- IDE – Eclipse oxygen
Development Steps
- Create a maven project
- Add the required dependencies – pom.xml
- Project structure
- Configure hibernate
- Create model class – EmployeeModel.java
- Develop the main application – ElementCollectionDemo.java
- Run and Test the application
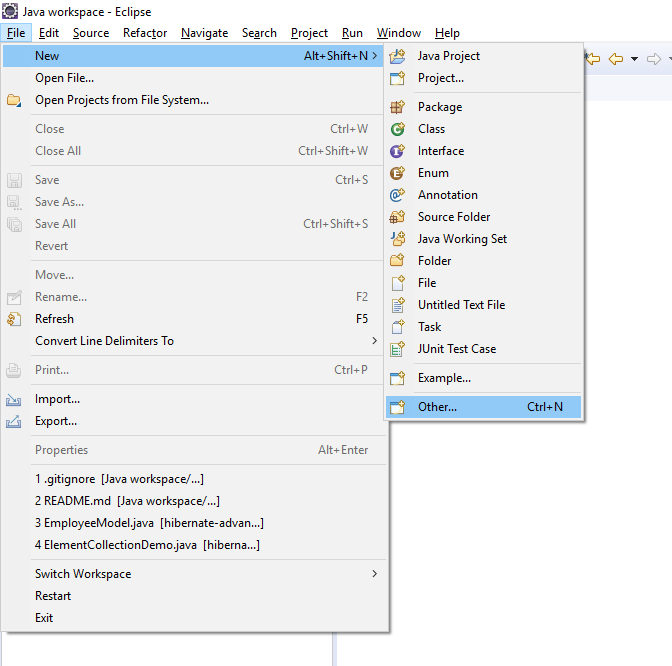
1. Create a maven quickstart project
In eclipse go to File -> New -> Select other as shown in the below image
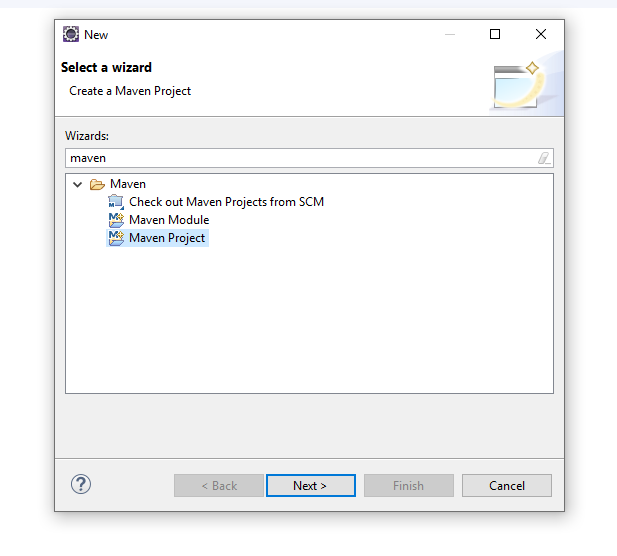
 Search for maven project as shown in the below image,
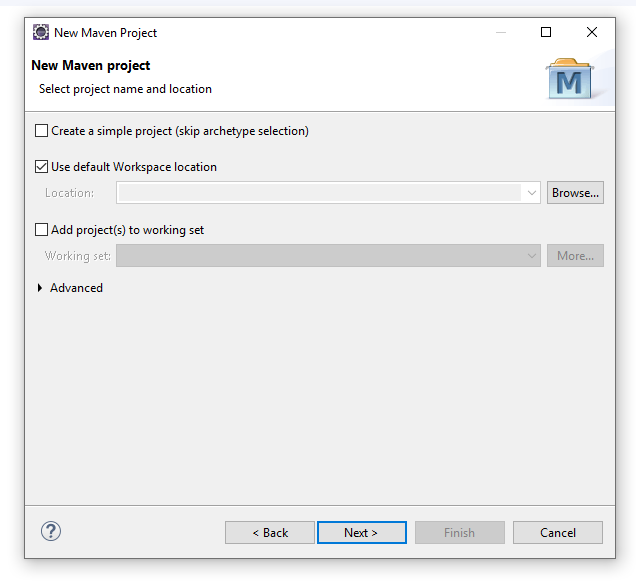
 Select maven project and click next,
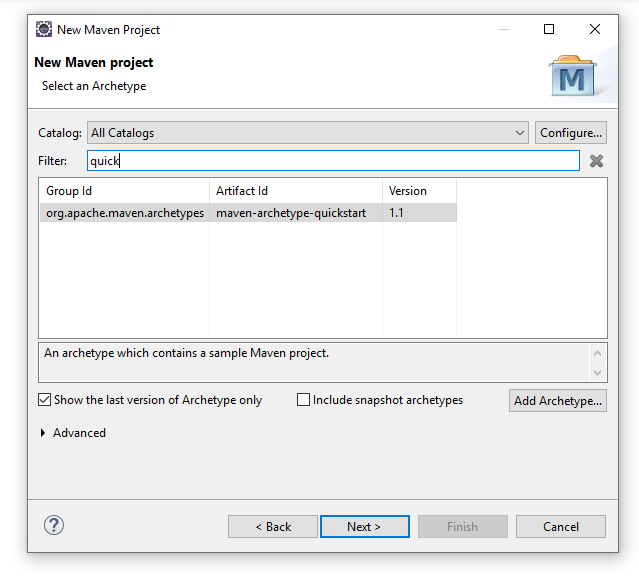
 Search for maven quickstart archetype as shown in the image,
 Enter the details as shown the below image,
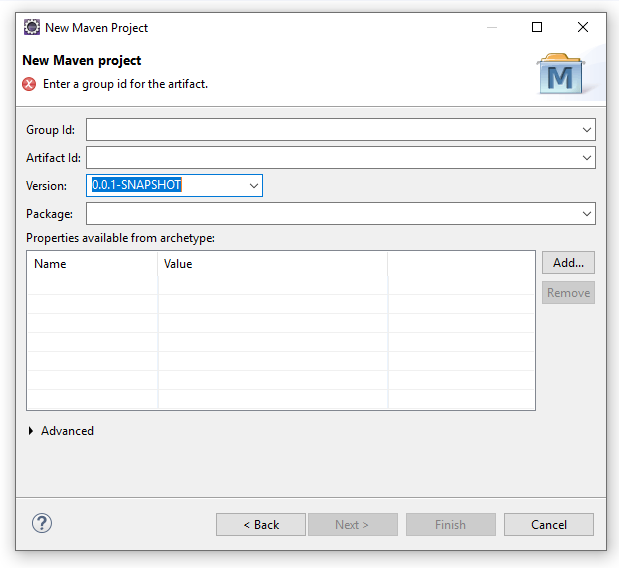 Group Id:
 in.bushansirgur
Artifact Id: hibernate-advance-concept-01
Version: 0.0.1-SNAPSHOT
Package: in.bushansirgur.hibernate
2. Add the required dependencies
Let’s define all the required dependencies in pom.xml to develop this application.
<project xmlns="http://maven.apache.org/POM/4.0.0" xmlns:xsi="http://www.w3.org/2001/XMLSchema-instance"
  xsi:schemaLocation="http://maven.apache.org/POM/4.0.0 http://maven.apache.org/xsd/maven-4.0.0.xsd">
  	<modelVersion>4.0.0</modelVersion>

  	<groupId>in.bushansirgur</groupId>
  	<artifactId>hibernate-advance-concept-01</artifactId>
  	<version>0.0.1-SNAPSHOT</version>
  	<packaging>jar</packaging>

  	<name>hibernate-advance-concept-01</name>
  	<url>http://maven.apache.org</url>

  	<properties>
		<project.build.sourceEncoding>UTF-8</project.build.sourceEncoding>
		<maven.compiler.source>1.8</maven.compiler.source>
		<maven.compiler.target>1.8</maven.compiler.target>
	</properties>

  	<dependencies>
    	<!-- Hibernate's core ORM functionality -->
		<dependency>
			<groupId>org.hibernate</groupId>
			<artifactId>hibernate-core</artifactId>
			<version>5.4.4.Final</version>
		</dependency>

		<!-- JDBC driver for MySQL -->
		<dependency>
			<groupId>mysql</groupId>
			<artifactId>mysql-connector-java</artifactId>
			<scope>runtime</scope>
			<version>5.1.47</version>
		</dependency>
  	</dependencies>

</project>
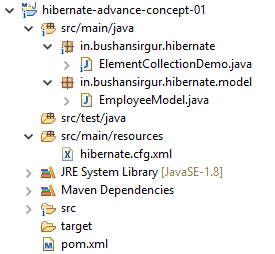
3. Project structure
Following is the project structure for your reference.
4. Configure hibernate
Create hibernate.cfg.xml file inside the resources folder and define the jdbc connection properties and hibernate properties.
<!DOCTYPE hibernate-configuration PUBLIC
"-//Hibernate/Hibernate Configuration DTD 3.0//EN"
"http://www.hibernate.org/dtd/hibernate-configuration-3.0.dtd">
<hibernate-configuration>
<session-factory>
<!-- JDBC Database connection settings -->
<property name="connection.driver_class">com.mysql.jdbc.Driver</property>
<property name="connection.url">jdbc:mysql://localhost:3306/hibernate_concepts?useSSL=false&serverTimezone=UTC</property>
<property name="connection.username">root</property>
<property name="connection.password">sa@12345</property>
<!-- JDBC connection pool settings ... using built-in test pool -->
<property name="connection.pool_size">1</property>
<!-- Select our SQL dialect -->
<property name="dialect">org.hibernate.dialect.MySQL5Dialect</property>
<!-- Echo the SQL to stdout -->
<property name="show_sql">true</property>
<!-- hiberante auto configuration for table creation -->
<property name="hibernate.hbm2ddl.auto">update</property>
<!-- Set the current session context -->
<property name="current_session_context_class">thread</property>
</session-factory>
</hibernate-configuration>
5. Create model class
Let’s create EmployeeModel model class inside the in.bushansirgur.hibernate.model package which will mapped to the employee table in the database
package in.bushansirgur.hibernate.model;

import java.util.Set;

import javax.persistence.CollectionTable;
import javax.persistence.Column;
import javax.persistence.ElementCollection;
import javax.persistence.Entity;
import javax.persistence.GeneratedValue;
import javax.persistence.GenerationType;
import javax.persistence.Id;
import javax.persistence.JoinColumn;
import javax.persistence.Table;

@Entity
@Table(name="employee")
public class EmployeeModel {

	@Id
	@GeneratedValue(strategy=GenerationType.IDENTITY)
	@Column
	private int id;

	@Column(name="full_name")
	private String name;

	@Column(name="email_id")
	private String email;

	@ElementCollection
	@CollectionTable(name="emplooyee_phone_numbers", joinColumns=@JoinColumn(name="employee_id"))
	@Column(name="phone_number")
	private Set<String> phoneNumbers;

	public EmployeeModel(String name, String email, Set<String> phoneNumbers) {
		this.name = name;
		this.email = email;
		this.phoneNumbers = phoneNumbers;
	}

	public int getId() {
		return id;
	}

	public void setId(int id) {
		this.id = id;
	}

	public String getName() {
		return name;
	}

	public void setName(String name) {
		this.name = name;
	}

	public String getEmail() {
		return email;
	}

	public void setEmail(String email) {
		this.email = email;
	}

	public Set<String> getPhoneNumbers() {
		return phoneNumbers;
	}

	public void setPhoneNumbers(Set<String> phoneNumbers) {
		this.phoneNumbers = phoneNumbers;
	}

	@Override
	public String toString() {
		return "EmployeeModel [id=" + id + ", name=" + name + ", email=" + email + ", phoneNumbers=" + phoneNumbers
				+ "]";
	}

}
6. Develop the main application
Let’s create ElementCollectionDemo class that defines the main method. Create employee object and add the phone numbers that the employee have. Finally we will persist the employee object and commit on the current transaction.
package in.bushansirgur.hibernate;

import java.util.HashSet;
import java.util.Set;

import org.hibernate.Session;
import org.hibernate.SessionFactory;
import org.hibernate.cfg.Configuration;

import in.bushansirgur.hibernate.model.EmployeeModel;

public class ElementCollectionDemo {

	public static void main(String[] args) {
		//create session factory
		SessionFactory factory = new Configuration().configure("hibernate.cfg.xml").addAnnotatedClass(EmployeeModel.class).buildSessionFactory();

		//get the current session
		Session session = factory.getCurrentSession();

		EmployeeModel employee = null;
		try {
			//create hashset and add phone numbers
			Set<String> phoneNumbers = new HashSet<String>();
			phoneNumbers.add("9988776655");
			phoneNumbers.add("9876543210");
			phoneNumbers.add("8899776655");
			phoneNumbers.add("9876543210");

			//create employee object
			employee = new EmployeeModel("Bushan", "bushan@bushansirgur.in", phoneNumbers);

			//start transaction
			session.beginTransaction();

			//save object
			session.persist(employee);

			//commit the transactions
			session.getTransaction().commit();
		}catch(Exception e) {
			e.printStackTrace();
		}finally {
			//close session and session factory
			session.close();
			factory.close();
		}
	}
}
7. Run and Test the application
After the run the application check the console, you will see the following output
Hibernate: create table emplooyee_phone_numbers (employee_id integer not null, phone_number varchar(255)) engine=MyISAM
Hibernate: create table employee (id integer not null auto_increment, email_id varchar(255), full_name varchar(255), primary key (id)) engine=MyISAM
Hibernate: alter table emplooyee_phone_numbers add constraint FKjsdvfbk14110ehxhy2v76ty0h foreign key (employee_id) references employee (id)
Hibernate: insert into employee (email_id, full_name) values (?, ?)
Hibernate: insert into emplooyee_phone_numbers (employee_id, phone_number) values (?, ?)
Hibernate: insert into emplooyee_phone_numbers (employee_id, phone_number) values (?, ?)
Hibernate: insert into emplooyee_phone_numbers (employee_id, phone_number) values (?, ?)
Go ahead and check all the tables in MySQL. The employee table will have a new entry and table employee_phone_numbers will have 3 entries.
mysql> select * from employee;
+----+------------------------+-----------+
| id | email_id               | full_name |
+----+------------------------+-----------+
|  1 | bushan@bushansirgur.in | Bushan    |
+----+------------------------+-----------+
1 row in set (0.01 sec)
mysql> select * from emplooyee_phone_numbers;
+-------------+--------------+
| employee_id | phone_number |
+-------------+--------------+
|           1 | 9988776655   |
|           1 | 9876543210   |
|           1 | 8899776655   |
+-------------+--------------+
3 rows in set (0.00 sec)
Conclustion
That’s all for the article. I hope you have learned something in this article.
You can find the entire source code for the project in my Github repository.
Github repository
Download source code of this project https://github.com/scbushan05/hibernate-advance-concept-01
Happy coding!
We have common dao service running on different VM..
When VMs and Jboss are getting exactly at the same time and during the deployment of ear file getting constraint violation issue on lets say in your case “phonenumbers table” though we have called session.merge.() method.
Is this a valide case?