Hey guys, in this post, we will be creating an end to end RESTful CRUD API with Node.js, Express, Mongoose, and MongoDB. Yes, we will use Mongoose for communicating with MongoDB.
Express is a light-weight web application framework to help organize your web application into an MVC architecture on the server-side. It’s built around configuration and granular simplicity of Connect middleware.
Mongoose is an ODM (Object Document Mapping) tool for Node.js and MongoDB. The main advantage is an abstraction over pure mongo. Many developers who come from SQL database types feel very uncomfortable working with dynamic collections that have no structure defined. So Schemas in the first place helps with that.
In order to persist the data, we will be using MongoDB. Make sure the install the MongoDB on your machine before proceeding. You can also install Robo3T or MongoDB Compass clients to interact with the database.
Table of Contents
Application Overview
In this tutorial, we will be creating a Blogging application. We will create rest endpoints for creating, reading, editing, and deleting a Blog.
Before creating rest endpoints, first, we will create a web server then we will configure the database, next we will create a model for Blog and finally, we will create routes for performing the CRUD operations.
Prerequisites
- ES6 features like let, const, arrow functions
- Handling the promises using then()
Now we understood the high-level overview of the application we will be building. Let’s call our application name Blog-App.
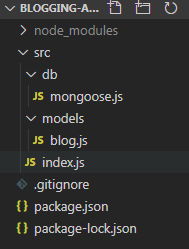
Let’s look at the directory structure
Creating the Application
Open your command prompt and create a new folder for the application
mkdir blogging-application
Initialize the application with npm (package.json file)
cd blogging-application
npm init -y
This will initialize the application with the package.json file
{
  "name": "blogging-app",
  "version": "1.0.0",
  "description": "",
  "main": "index.js",
  "scripts": {
    "test": "echo \"Error: no test specified\" && exit 1"
  },
  "keywords": [],
  "author": "",
  "license": "ISC"
}
Notice that it specified the index.js as the entry point to our application. We will create index.js in the next section.
Install the required dependencies
We need to install express, mongoose, and nodemon in our application. Let’s install them all together
npm install express mongoose nodemon --save--save option will add the dependencies in the package.json file, dependencies object. The final package.json file looks like this
{
  "name": "blogging-app-v3",
  "version": "1.0.0",
  "description": "",
  "main": "index.js",
  "scripts": {
    "dev": "nodemon src/index.js"
  },
  "keywords": [],
  "author": "",
  "license": "ISC",
  "dependencies": {
    "express": "^4.17.1",
    "mongoose": "^5.10.6",
    "nodemon": "^2.0.4"
  }
}
Notice, we also modified the scripts object. This is because we need to run our application in watch mode, meaning as soon as we make changes to the application, it should build the application once again. This will make our development easier and faster, and nodemon will help us to run the application in watch mode.
ConFiguration for connecting to database
I would like to keep all the database related configuration in a separate folder. Let’s create a new folder inside the root of our application.
mkdir src
cd src
mkdir db
inside the db folder, let’s create a new file mongoose.js and add the following contents
const mongoose = require('mongoose');

mongoose.connect('mongodb://localhost:27017/bloggingapp',
{
    useNewUrlParser: true,
    useUnifiedTopology: true
});
So here first we are loading the mongoose module, then on the mongoose object, we will call connect() to connect to the database.
Create a Mongoose model for Blog
Next, we will define the Blog model. Create a new folder model inside the src folder.
mkdir src/modelsInside the folder create a file blog.js and add the following contents
const mongoose = require('mongoose');

const blogSchema = new mongoose.Schema({
    title: String,
    subTitle: String,
    description: String
});

const Blog = mongoose.model('Blog', blogSchema);

module.exports = Blog;
This model class is very simple. It contains 3 properties title, subTitle, and description.
Setting up the web server
Now let’s create the entry point file of our application index.js inside the src folder and add the following contents
require('./db/mongoose');
const express = require('express');
const Blog = require('./models/blog');

const app = express();
app.use(express.json());

app.listen(3000, (req, res) => {
    console.log('app is running in port 3000!');
})
First, we will import the database config file for the database connection, next we will load the express module to create a web server and then we will import the mongoose model Blog.
Second, we will call express() to create a web server, mongoose module will contain a single method that is express(), which will create a web server. Next, we will add express.json() middleware using express’s app.use() method. A middleware is a function that has access to the request and response objects. It can execute any code, transform the request object, or return a response.
Finally, we listen on port 3000 when we run our application.
Let’s now run the server and go to http://localhost:3000 to access the application.
npm run devThis will print the following message in the console
app is running in port 3000!-
Define routes using Express
We will create routes for create, read, update and delete blog for our model and we will define inside the index.js file
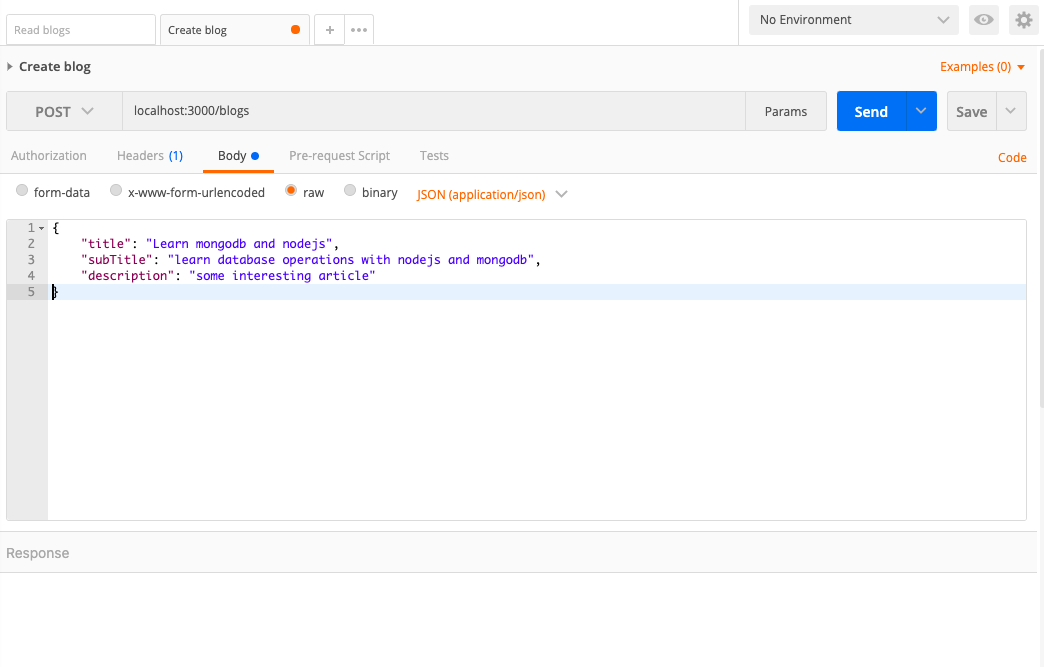
Create and save the blog
app.post('/blogs', (req, res) => {
    const blog = new Blog(req.body);
    blog.save().then((blog) => {
        res.status(201).send(blog);
    }).catch((error) => {
        res.status(400).send(error);
    })
})
First, we will create the instance of a Blog then we will call mongoose save() on the blog object. Mongoose save() will return a promise, so using then()and catch()we will handle it.
Read more about mongoose
save()here
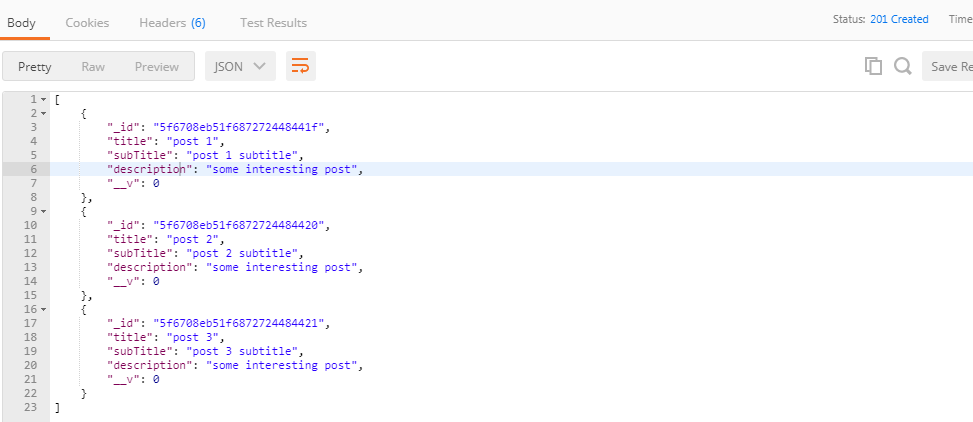
Read all blogs
app.get('/blogs', (req, res) => {
    Blog.find({}).then((blogs) => {
        res.send(blogs);
    }).catch((error) => {
        res.status(500).send(error);
    })
})
Here on the Blog model, we will call mongoose find(), this will return a promise
Read more about mongoose query methods here
Read a single blog
app.get('/blogs/:id', (req, res) => {
    Blog.findById(req.params.id).then((blog) => {
        if (!blog) {
            return res.status(404).send();
        }
        res.send(blog);
    }).catch((error) => {
        res.status(500).send(error);
    })
})
So, here we will pass the parameter to route, then using req.params.id we will get the route parameter. Next, we will call mongoose findById() to get a single blog by passing the blog id.
Update the blog
app.patch('/blogs/:id', (req, res) => {
    Blog.findByIdAndUpdate(req.params.id, req.body, {new: true}).then((blog) => {
        if (!blog) {
            return res.status(404).send();
        }
        res.send(blog);
    }).catch(error => {
        res.status(500).send(error);
    })
})
Here, we will call mongoose findByIdAndUpdate(), first, this will find the blog using the blog id, and then it will update the blog.
Here, we are passing the object to the options parameter. new: true this will return the updated object back to the client. if you don’t set to true then it will not return the modified object.
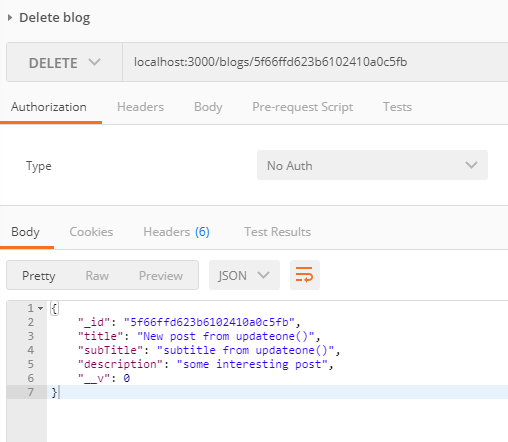
Delete a blog
app.delete('/blogs/:id', (req, res) => {
    Blog.findByIdAndDelete(req.params.id).then(blog => {
        if (!blog) {
            return res.status(404).send();
        }
        res.send(blog);
    }).catch(error => {
        res.status(500).send(error);
    })
})
Here, we will call the mongoose findByIdAndDelete(). All mongoose query methods will return Query object.
complete index.js file looks like this
require('./db/mongoose');
const express = require('express');
const Blog = require('./models/blog');

const app = express();
app.use(express.json());

app.post('/blogs', async (req, res) => {
    const blog = new Blog(req.body);
    try {
        await blog.save();
        res.status(201).send(blog);
    } catch (error) {
        res.status(500).send(error);
    }
})

app.get('/blogs', async (req, res) => {
    try {
        const blogs = await Blog.find({});
        res.status(200).send(blogs);
    } catch (error) {
        res.status(500).send(error);
    }
})

app.get('/blogs/:id', async (req, res) => {
    try {
        const blog = await Blog.findById(req.params.id);
        if (!blog) {
            return res.status(404);
        }
        res.status(200).send(blog);
    } catch (error) {
        res.status(500).send(error);
    }
})

app.patch('/blogs/:id', async (req, res) => {
    try {
        const blog = await Blog.findByIdAndUpdate(req.params.id, req.body, {new: true});
        if (!blog) {
            return res.status(404).send();
        }
        res.status(200).send(blog);
    } catch (error) {
        res.status(500).send(error);
    }
})

app.delete('/blogs/:id', async (req, res) => {
    try {
        const blog = await Blog.findByIdAndDelete(req.params.id);
        if (!blog) {
            return res.status(404).send();
        }
        res.send(blog);
    } catch (error) {
        res.status(500).send(error);
    }
})

app.listen(3000, (req, res) => {
    console.log('app is running in port 3000!');
})
Testing the end points
Create a new blog POST /blogs
 Read all blogs
 GET /blogs
Delete a blog DELETE /blogs/:id
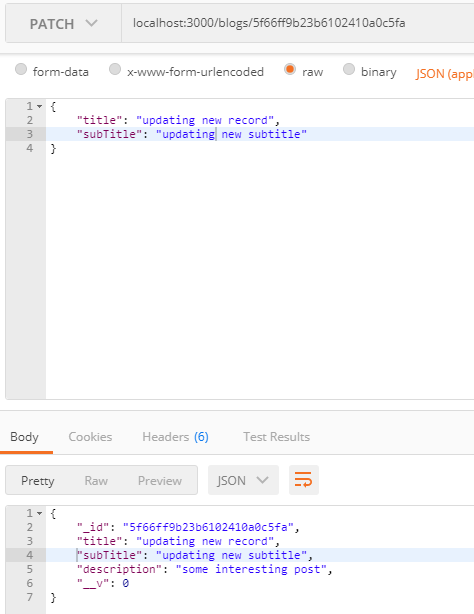
Update a blog PATCH /blogs/:id
Conclusion
In this post, we learned how to create rest apis in node.js, express and mongodb.
You can find the source code on my Github repository. If you found this post useful consider sharing this with your friends, colleagues, or in WhatsApp group. Give a star to my GitHub repo so that it will help others as well.
Clone the github repository from here
Thanks for reading. See you some other time.