

Hello guys, Bushan here, welcome back to B2 Tech! Today in this article, I will show you how to create a database in MySQL and get the Connection in Java so let’s get started.
Requirements:
- MySQL Database or WAMP Server or XAMPP Server
- Netbeans IDE
The first step is to go to phpMyAdmin, click on the SQL tab, execute the following command,
create database student;
The second step is to, select the database, execute the following command,
use student;
The third step is to create a table, execute the following command,
create table details(
	sid varchar(10) primary key not null,
	sname varchar(40) not null,
	sage int(3) not null
);
The fourth step is to create a project inside the Netbeans IDE,
File-> New project-> Java-> Java application, Give a name to your application and click finish
The fifth step is to create a class Connection.java inside the project and write the following code
Connection.java
import java.sql.*;
import javax.swing.*;
public class connection {
public static Connection connectdb(){
try{
Class.forName("com.mysql.jdbc.Driver");
Connection conn = DriverManager.getConnection("jdbc:mysql://localhost:3306/student", "root", "");
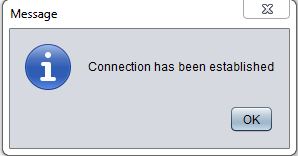
JOptionPane.showMessageDialog(null, "Connection has been established");
return conn;
}catch(Exception e){
JOptionPane.showMessageDialog(null, e);
return null;
}
}
}
The sixth step is to add MySQL-connector jar to the project/library
The seventh step is to create JFrame form login.java, inside the project,
login.java
import java.sql.*;

public class login extends javax.swing.JFrame {
    Connection conn = null;
    public login() {
        initComponents();
        conn = connection.connectdb();
    }
}
At last call, the connectdb() inside the constructor so that as soon as the application runs/constructor is created, conn object will be initialized.
So at this point, if we run the application we will get the blank JFrame form and an alert message saying that connection has been established.

That’s it for this article, in the next article let’s discuss, how to insert values to MySQL Database.